
Archive for January, 2006


CoreImage Resizer
I’ve posted the source to the CoreImage based photo thumbnailer that I’ve been working on lately. A couple of caveats, it works for me, and it needs a refactor. It’s probably more useful as an example at this point than a finished product.
No commentsGroup W Bench, revisited
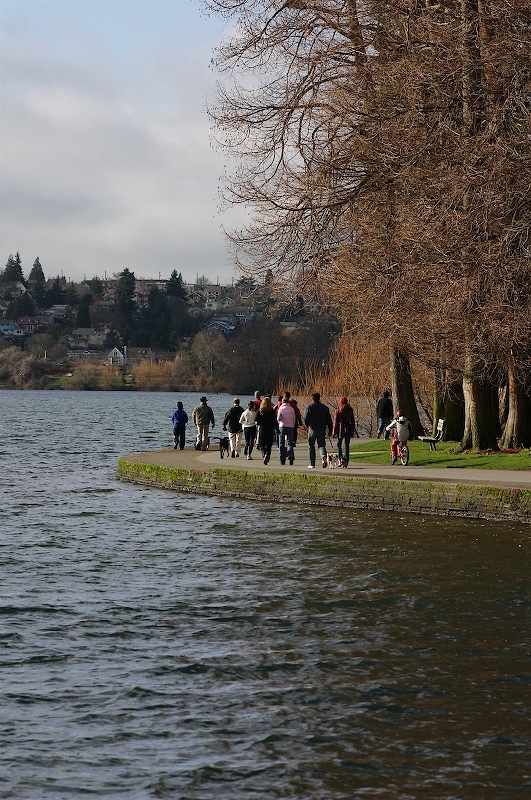
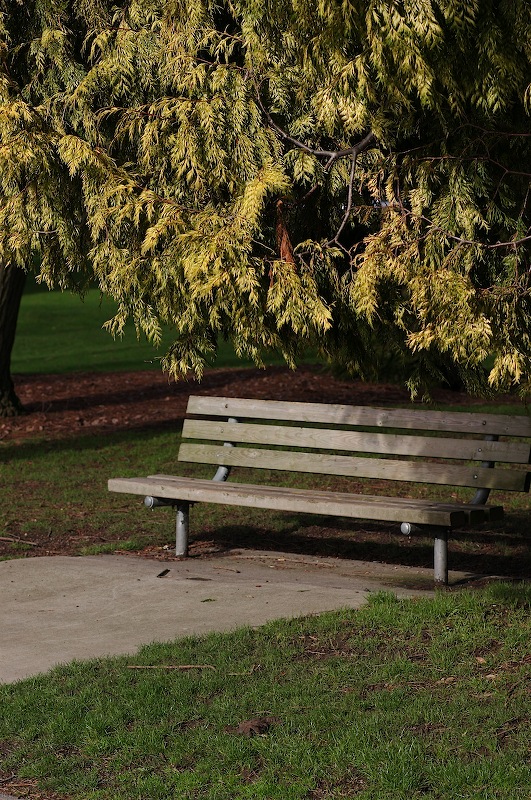
Last weekend there was a display of 2000+ grave markers, to remember the US Military personnel who have been killed in Iraq.

I was trying to capture something of the quantity of markers, against the Group W Bench graffiti that’s on most of the benches around Greenlake. Didn’t quite capture the feeling that I wanted, but I’m not sure how I would have gone about setting up that shot. For comparison, the PI ran a picture of a single person, bending over to examine one in a sea of markers. There’s something about pictures that could be ‘important’ that freezes me up about how to approach them. This shot probably would have worked better if there was someone on the bench as a focal point, but getting the subject, graffiti, and markers in one shot without looking like I’m forcing it would have been a real trick.
Flashing a Buffalo Airstation WBR2-G54 with OpenWRT
This is an amalgam of experience and the OpenWRT directions from these two similar, but not identical routers.
The Airstation WBR2-G54 is a Broadcom based wifi router, similar in concept to the famous Linksys WRT54GL. It’s linux based, and flashable to allow custom firmwares that give you access to all the linuxy goodness under the hood.
***How to flash
I’m using the OpenWRT White Russian RC4 image for generic broadcom routers. This image won’t install through the web interface, so it’s tftp time. These commands are OSX centric, but will generally work elsewhere.
- Download the image.
- Get all the documentation that you’ll need, and disconnect the router from the internet (wan port) and any other computers. I plugged an ethernet cable directly between my laptop’s ethernet port and the lan port #1 on the router, then turned off the airport card. You want to be doing this over a wire, and it reduces confusion if there’s only one other device that might be responding to your pings.
- Open a terminal window, and ping the router on 192.168.11.1. This is the default address for this router. If you don’t get responses like:
64 bytes from 192.168.11.1: icmp_seq=660 ttl=64 time=0.865 ms
then you will need to make sure that you’ve got everything plugged in correctly, and that you have valid ips and the like. Leave this ping command running, it will be important in a minute.
- Open another terminal window, make sure that you’re in the same directory as the downloaded firmware, and fire up tftp. Enter the following, but don’t hit return on the last command, we want it ready to fire in the several second window that we’ll have.
tftp 192.168.11.1
tftp> binary
tftp> trace
tftp> rexmt 1
tftp> timeout 60
tftp> put openwrt-brcm-2.4-squashfs.trx
- Now, press and hold the INIT button on the router, 5 seconds or so. The DIAG led should flash slowly. Watch the window with the ping running, and you should see something like:
64 bytes from 192.168.11.1: icmp_seq=663 ttl=64 time=0.867 ms
64 bytes from 192.168.11.1: icmp_seq=664 ttl=64 time=0.900 ms
64 bytes from 192.168.11.1: icmp_seq=671 ttl=100 time=2.351 ms
64 bytes from 192.168.11.1: icmp_seq=672 ttl=100 time=0.992 ms
64 bytes from 192.168.11.1: icmp_seq=673 ttl=100 time=1.732 ms
64 bytes from 192.168.11.1: icmp_seq=674 ttl=100 time=2.032 ms
There are 2 things to note here, there is a gap of 5 seconds or so between the second and third line, and the third line has a ttl of 100, rather than 64. This is an indicator that the router is listening for tftp connections and can load the firmware.
- When you see the ttl=100 line in the ping output, hit return in the other window to start the tftp process. If all goes well, you should see
tftp> put openwrt-brcm-2.4-squashfs.trx
sent WRQ <file=open2.trx, mode=octet>
received ACK <block=0>
sent DATA <block=1, 512 bytes>
received ACK <block=1>
...
- Sit tight for a few minutes, don’t interrupt the power or you could wind up with a half flashed brick. The router should reboot, respond to the pings again, and be accessible through telnet or http.


Workflow — two steps forward, one half step back.
It suddenly hit me yesterday that the work that I was doing for thumbnailing images using CoreImage may actually be the breakthrough that I was looking for to add a basic raw workflow to my current jpeg one.
I’ve tried a few options in the past with some sample images, perhaps a total of 50 frames of raw vs. 17000 of jpeg. The goal for the workflow is to be able to pop a card into the reader, download, and create web sized and thumbnails from the full size images. Anything that is sufficiently good for hard copy or is going to recieve special treatment of exposure compensation, cropping, b&w, or photoshop in general is going to be processed again from the full sized image. The key here is to go from card to triage quickly and with no per image intervention.


The only drawback that I’m seeing with using CoreImage raw conversions for the basic conversions is that I can’t find the orientation data in the file. It doesn’t seem to exist in the image source properties. I know it’s there somewhere, as I can’t imagine Canon just not including it in the raw file. I just can’t find it in CoreImage’s attributes.
***UPDATE:
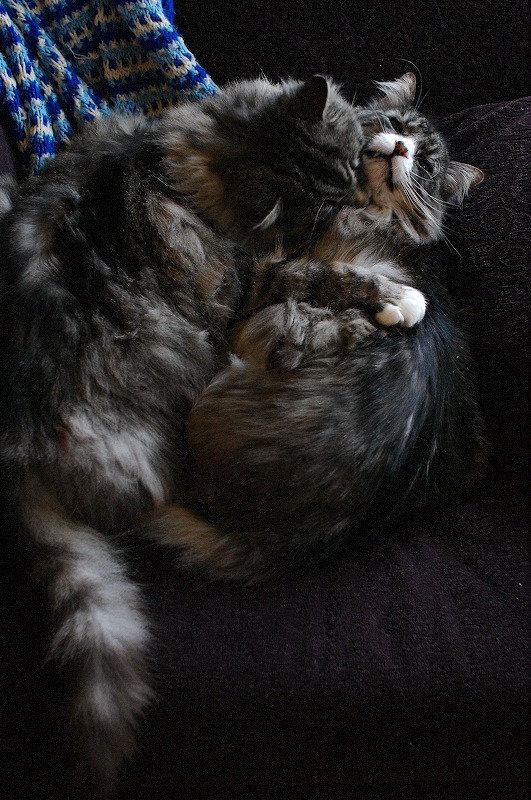
While I can’t find the orientation data, it exists, somewhere, because it’s doing the right thing. Those cat pictures were taken vertically in raw and not manually rotated, yet they came out correctly.
No comments